Características destacadas
- Thermometer for RouterBoards Mikrotik.
- Powered from the RouterBoards COM port - extremely low power consumption.
- Integrated temperature sensor.
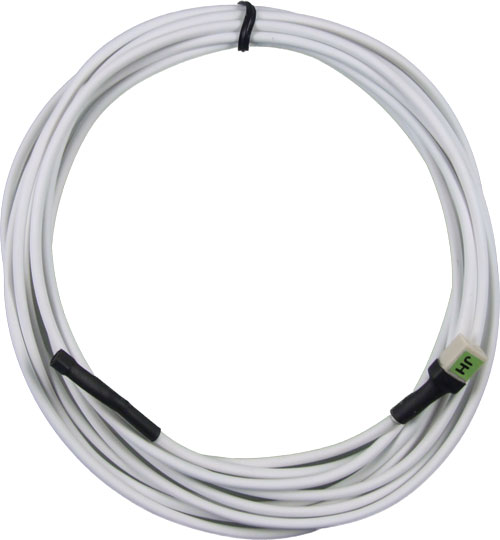
- External input: For second temperature sensor or monitoring the status of switch.
- External sensor with a length up to 20 m.
- After turning on the thermometer sends current data (temperature and status of a switch) to RouterBoard every 10 sec.
- Communication speed 9,6 kBd or 115,2 kBd.
- Measurement of temperature in Celsius or Fahrenheit.
- The possibility of an external power supply.
- The possibility of a serial line connected to a non-standard cable.
- Measures temperatures from -55°C to +125°C, 0,1°C resolution
- Operating temperature range: -20 to +70 °C
- This thermometer is a part of Made for Mikrotik program - we are among MikroTik Certified Integrators.
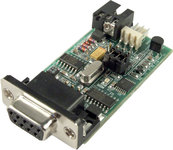
Descripción
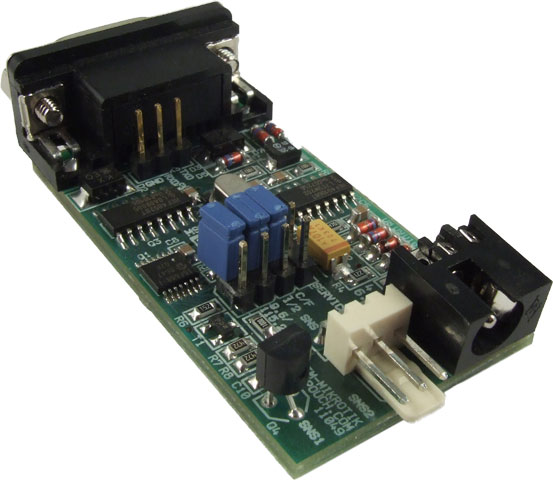
This version of thermometer TM is designed specifically for Mikrotik RouterBOARDs. Thermometer is connected to the RouterBOARD’s serial port and it is powered from the same port. With this thermometer you can measure temperature from 2 points or monitor a status of switch.
This version of thermometer TM Mikrotik is derived from standard serial TM thermometer.
Usage
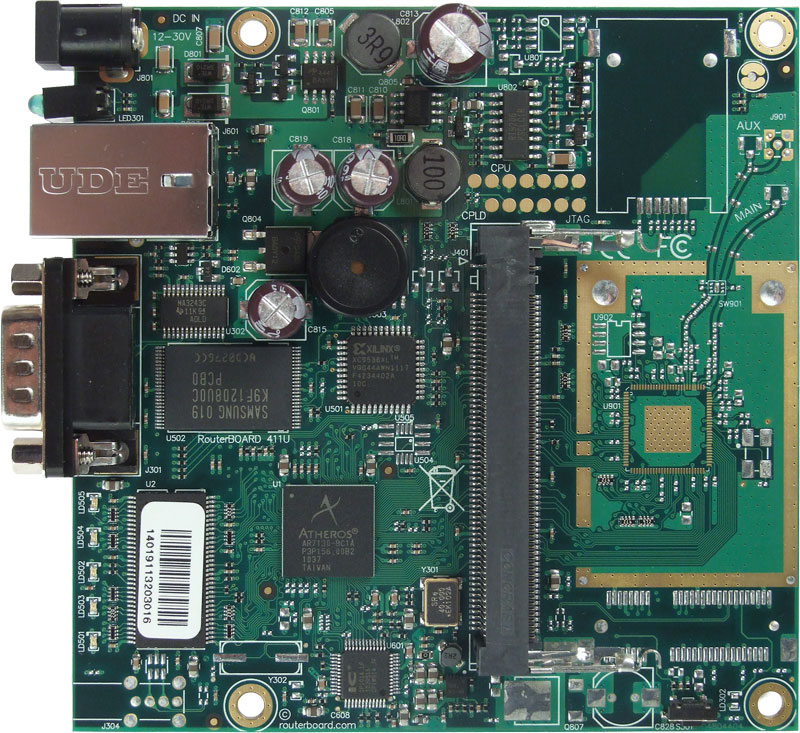
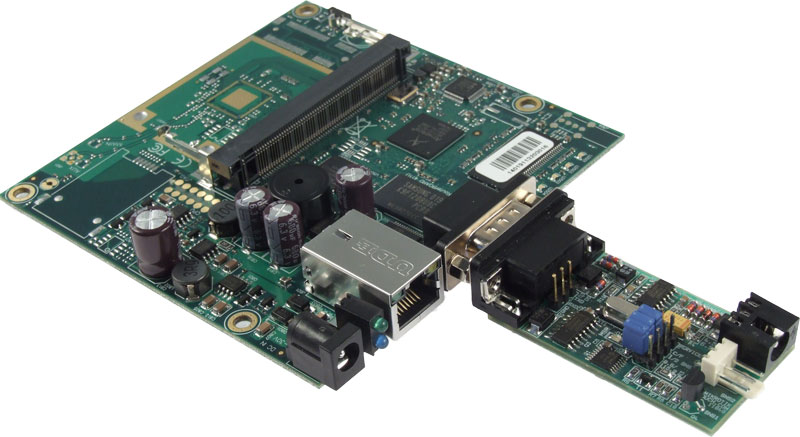
- How to connect TM Mikrotik to the RouterBOARD Mikrotik.
Thermometer connected to the RouterBoard RB411 (click to enlarge)
Transfer and publishing temperature to the web server
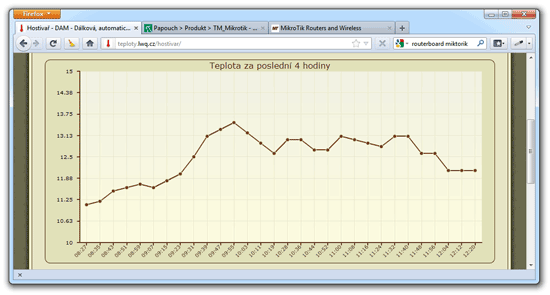
The following guide is an example how TM Mikrotik can be used to send temperature on the server and display it in the graph. The author of instructions and scripts is lwq.cz. Thank you for your cooperation.
Example of measured temperature on TM Mikrotik, connected to RouterBoard - online teploty.lwq.cz/hostivar
The general procedure, What is needed?
- RouterBoard with RS232 or PC with installed RouterOS version 4.x or later (tested with version 5.9 on RB411U).
- TM_Mikrotik must be correctly set up using jumper switch. Described in the documentation for thermometer.
- After connecting thermometer to RS232 the activity is indicated by LED.
- It is necessary to have unused RS232 (software unused port) for connecting TM Mikrotik.
- Then set remote-access with logging for serial0 and appropriate scripts.
- Data file is uploaded using FTP on the server and second script in RB sends commands to the first script for data processig.
- Data is saved to the MySQL database and then presented - for example in application code.google.com/p/tmep/
The specific procedure for setting RouterOS on RouterBOARD:
Scripts below is necessary execute via ssh/telnet or RouterBoards terminal.
- Turn off the system console on serial0 (on /system console print is serial0 number 0):
/system console set 0 disabled="yes"
- Setting remote-access on serial0 with logging traffic.
/port remote-access add allowed-addresses=0.0.0.0/0 channel=0 disabled="no" log-file="tm.dat" port="serial0" protocol="raw" tcp-port=0
- Create two tasks that run periodically:
First script - runs once a day
First script controls turning off remote-access on thermometer port, deleting data file and restarting the logging. This script runs once a day. It can be run more often, but it is necessary only for very slow data lines. Script sends one file with max. file size 150kB, which is logged all day (file size increases - file transfer is greatest at night, when the Internet usage drops). If the script ran more often the transferred file would be smaller, but log file in the RouterBoard would be more filled and settings would be changed too often. Permissions are set to the minimum necessary for operation.
02 | add disabled=no interval=1d name=Refresh_TM on-event="/port remote-access set 0 d\ |
07 | \n/file remove tm.dat\r\ |
11 | \n/port remote-access set 0 disabled=no" policy=\ |
12 | read,write,test start-date=mar/27/2012 start-time=01:00:03 |
Second script - runs e.g. once per minute
Second script controls sending regular data, for example every minute via FTP to a remote server and then run the script located here for data processing (addition to MySQL, etc.):
02 | add disabled=no interval=1m name=Send_TM on-event="/tool fetch mode=\"ftp\" \ |
03 | address=\"ftp.example.com\" user=\"user_tm\" password=\"tm_user_pwd\" src-pat\ |
04 | h=\"tm.dat\" dst-path=\"tm_factory0086.dat\" upload=\"yes\" ascii=\"no\" keep\ |
09 | \n/tool fetch mode=\"http\" url=\"http://temp.example.com/tmp/maker.p\ |
10 | hp\?do=factory0086\" keep-result=\"no\"" policy=\ |
11 | ftp,read,write,test start-date=mar/27/2012 start-time=23:03:57 |
Now we have set to send data from RouterBoard and the server can process the data furthermore.
Processing temperatures of the RouterBoard on the server
In the below example a modified application TMEP 4.2 is used. This application processes data from thermometer. Example of the marker.php script:
03 | if ($_GET["do"] == "factory0086") { |
04 | $aFile = @file("./tm_hostivar.dat"); |
06 | if (count($aFile) > 1) { |
09 | for ($i = 0; $i < count($aFile); $i++) { |
12 | if (strlen($aFile[$i]) < 4) continue; |
14 | $aTMP = explode(";", trim($aFile[$i])); |
16 | $aTemp = array("temp_1" => floatval(substr($aTMP[0], 0, strlen($aTMP[0])-1)), "temp_2" => floatval(substr($aTMP[1], 0, strlen($aTMP[1])-1))); |
20 | $sUrl = "http://temp.example.com/index.php?temp_factory0086="; |
25 | <body><?php echo "Success ! (".$aTemp["temp_2"]."C)"; ?></body> |
28 | @file($sUrl.$aTemp["temp_2"]); |
33 | Header("Location: http://temp.example.com/", TRUE, 301); |